Alert
Please complete all of the steps before hitting the Submit button. Clicking the Submit button should be performed in Step 6.
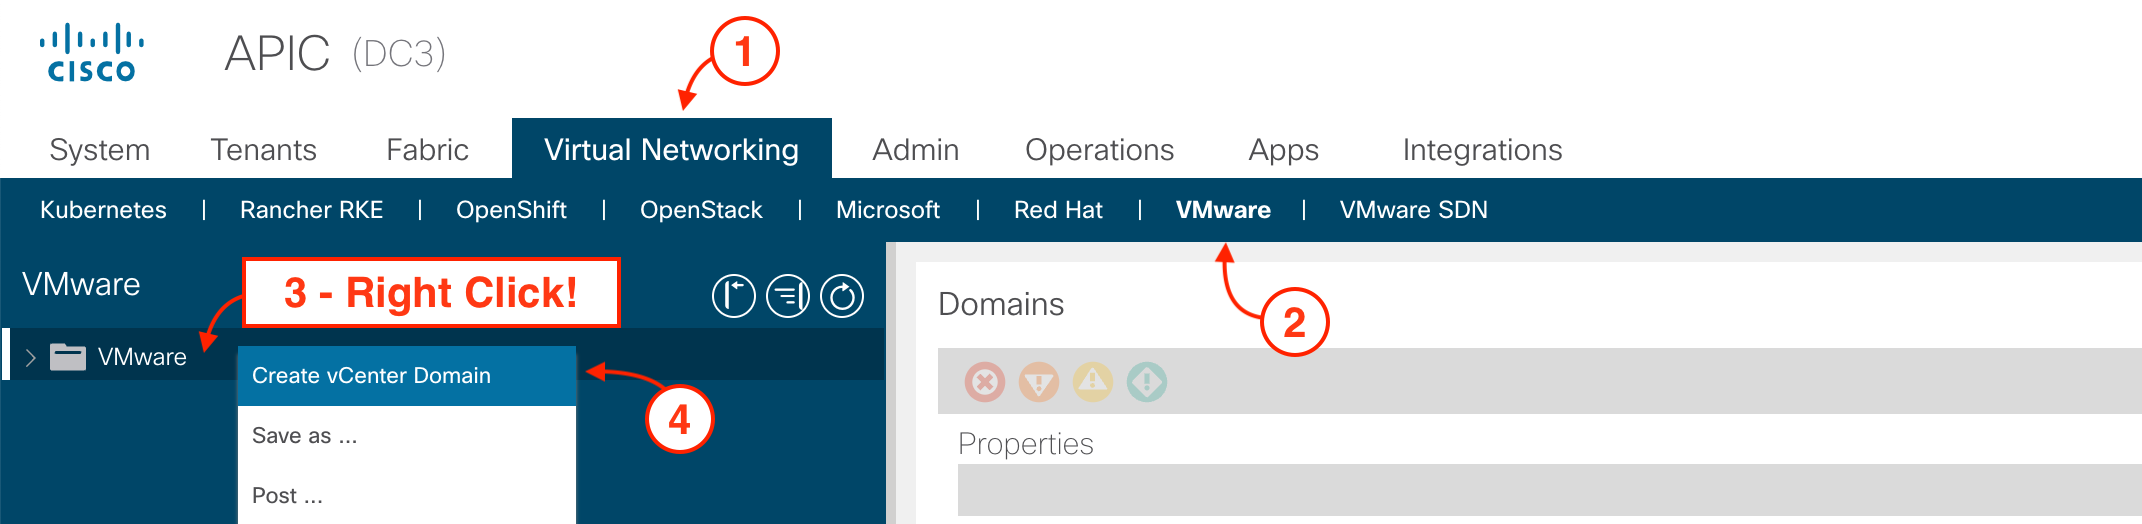
Step 1 - Navigate to VMware under the Virtual Networking Tab
To create a VMware VMM Domain, navigate to:
- Virtual Networking
- Click VMware
- Right-click on VMware
- Click Create vCenter Domain
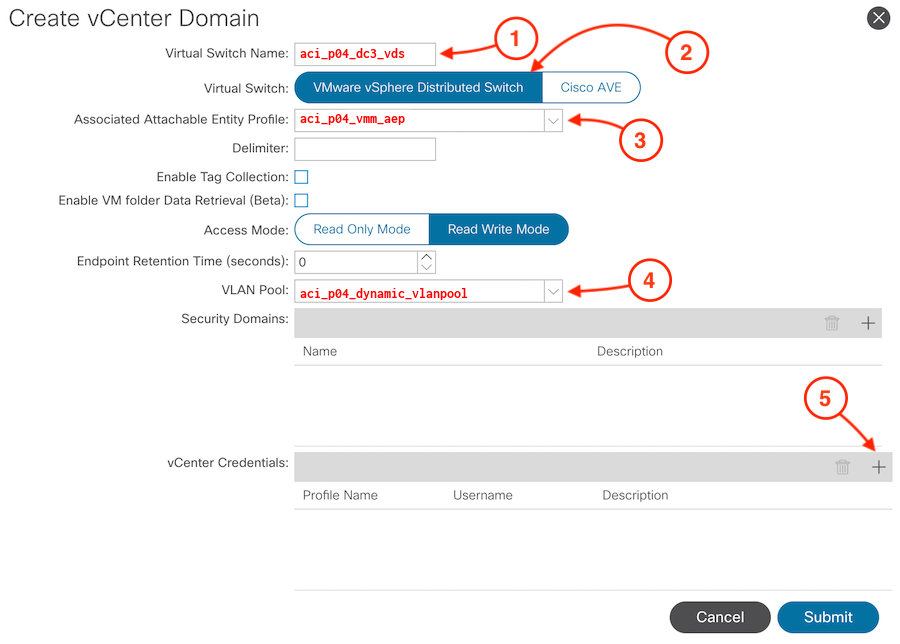
Step 2 - Create VMware VMM Domain
Create a VMware VMM Domain:
-
Name the Virtual Switch Name:
aci_p04_dc3_vds
- Ensure the Virtual Switch is set to VMware vSphere Distributed Switch (this is the default)
- In the AEP dropdown, select your VMM AEP you created earlier: aci_p04_vmm_aep
- In the VLAN Pool dropdown, select your dynammic VLAN Pool you created earlier: aci_p04_dynamic_vlanpool
- Click the plus button (+) in the vCenter Credentials section to create your vCenter Credentials Profile
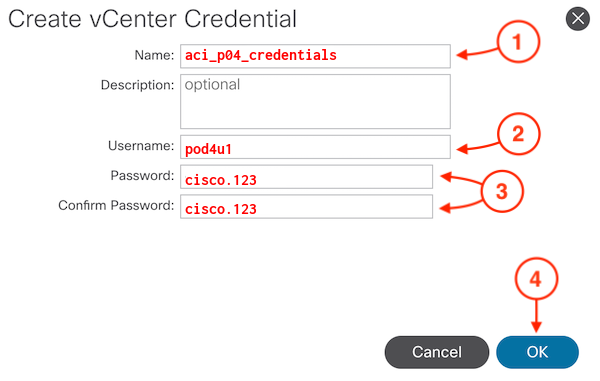
Step 3 - Create vCenter Credentials Profile
Create a vCenter Credentials Profile that will be used to authenticate with the vCenter:
-
Name the vCenter Credentials Profile:
aci_p04_credentials
-
Set the Username to:
pod4u1
-
Set the Password to:
cisco.123
-
Click OK
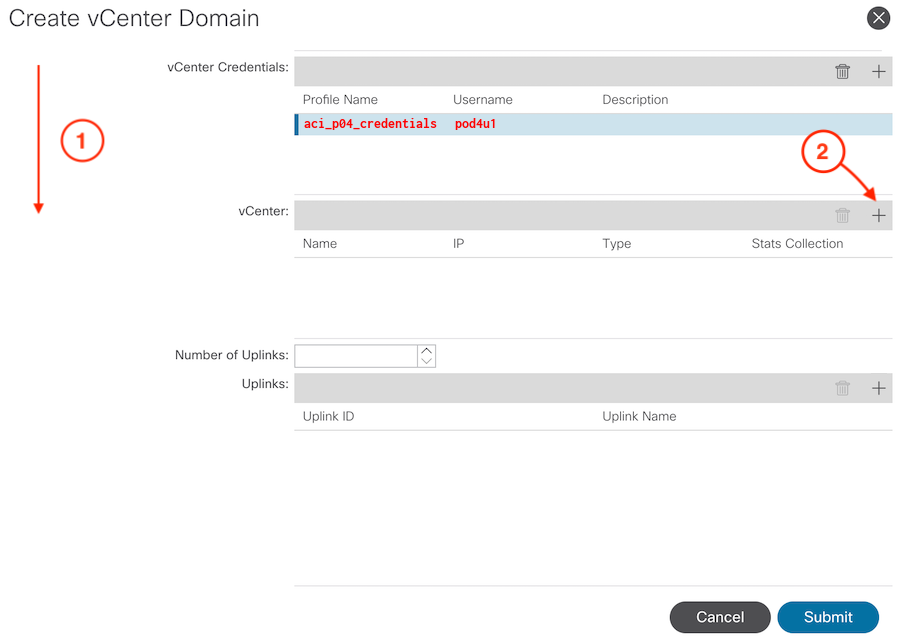
Step 4 - Continue Creating VMware VMM Domain by Adding vCenter Profile
The next step in creating a VMware VMM Domain is to create a profile for the vCenter controller:
- Scroll down in the wizard until you see vCenter:
- Click the plus button (+) in the vCenter section to create your vCenter Profile
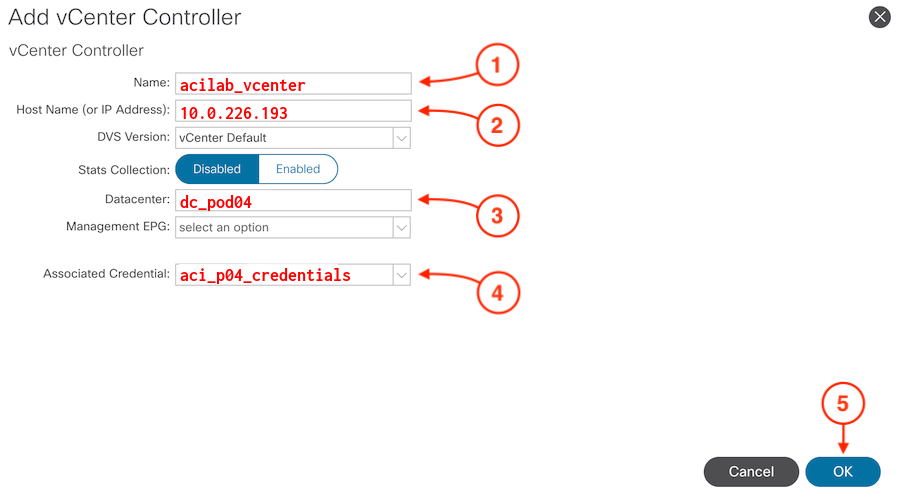
Step 5 - Create vCenter Profile
The next step in creating a VMware VMM Domain is to create a profile for the vCenter controller:
-
Name the vCenter Profile:
acilab_vcenter
-
Name the vCenter IP Address to:
10.0.226.193
-
Set the Datacenter name to:
dc_pod04
-
In the Associated Credential dropdown, select your previously created credentials profile:
aci_p04_credentials
-
Click OK
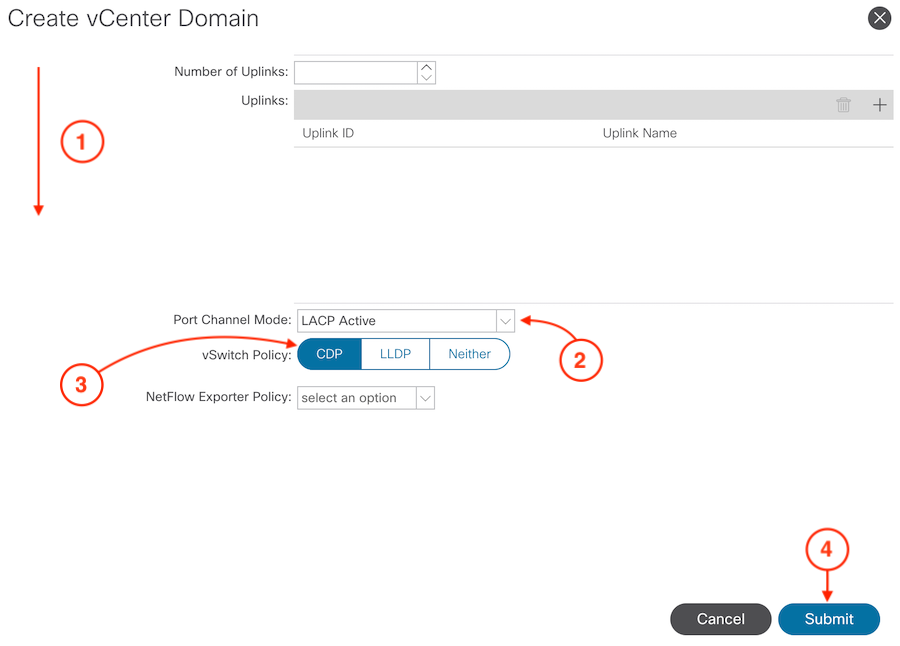
Step 6 - Complete the VMware VMM Domain Setup
To finish the setup of your VMware VMM Domain,
- Scroll down until you see Port Channel Mode:
- Set the Port Channel Mode to LACP Active
- For the vSwitch Policy, select CDP for this lab
- Click Submit
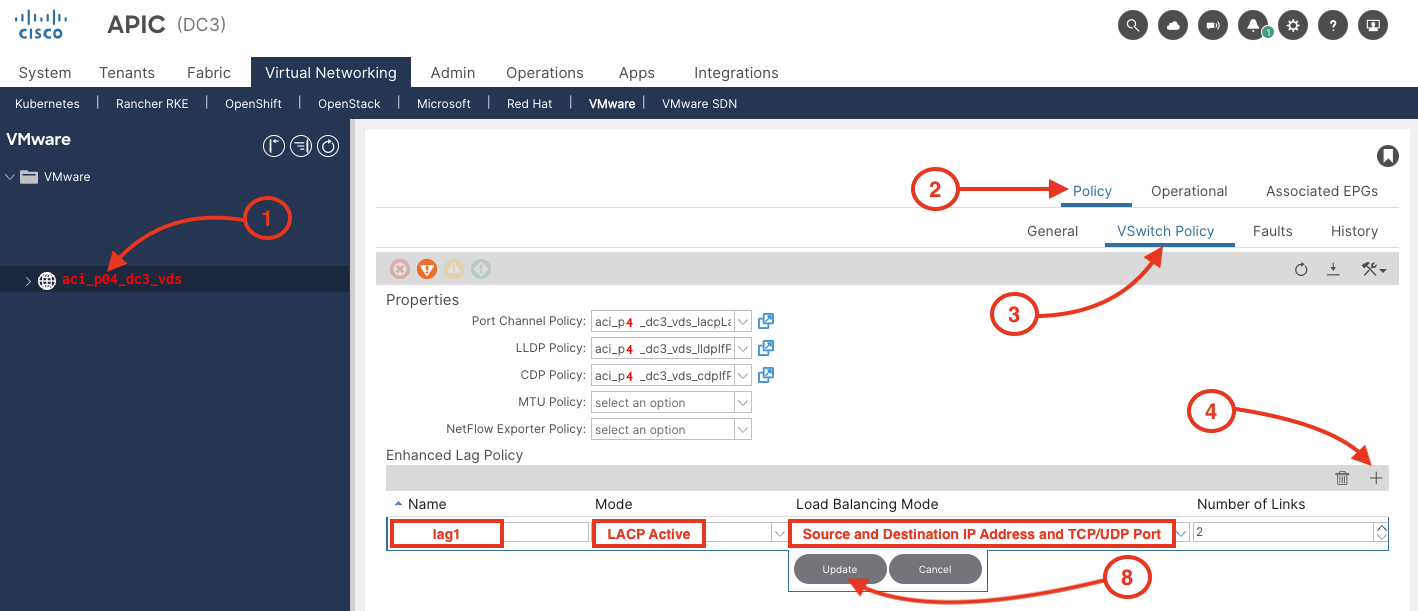
Step 7 - Add Enhanced Lag Policy
To finish the setup of your VMware VMM Domain follow the steps below:
- Click On your VMM vDS
- Click on Policy
- Click VSwitch Policy
- Click Plus sign
- Name:
lag1
- Mode: LACP Active
- Load Balancing Mode: Source and Destination IP Address and TCP/UDP Port
- Click Update
Continue to the next section to review the ACI and VMware integration from with VMware's vCenter and complete the final integration steps.
ACI Object
This is the response from the fabric as to what is configured.
ACI Object
This is the response from the fabric as to what is configured.
