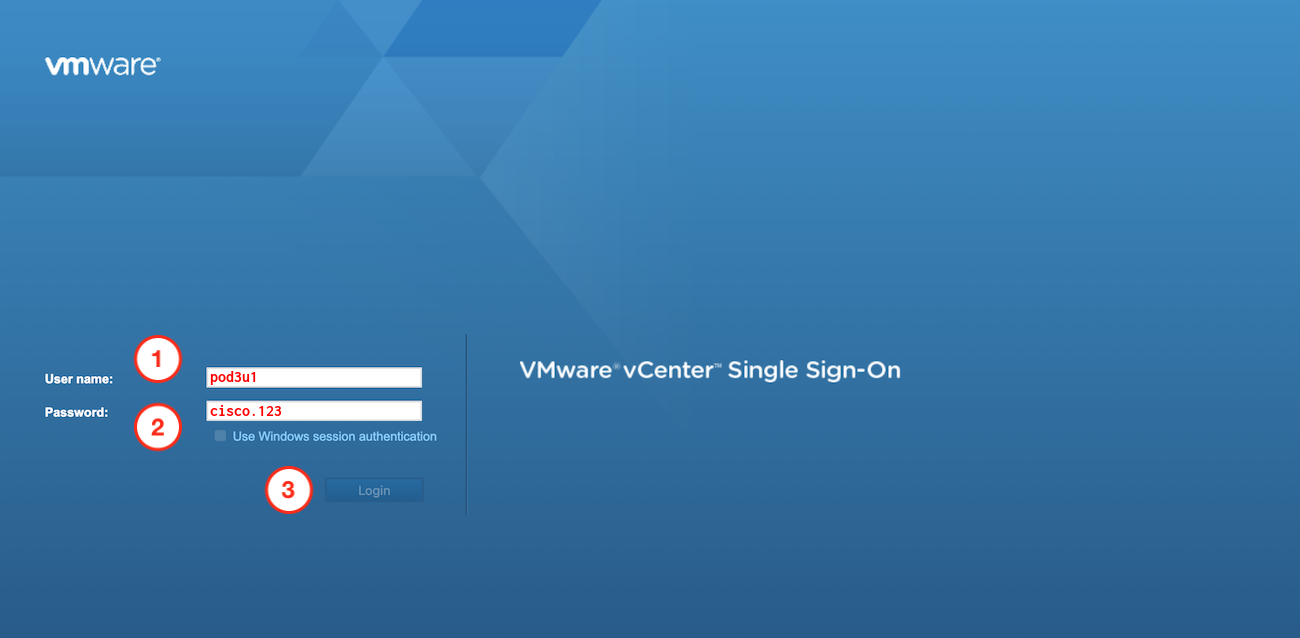
Step 1 - Navigate to VMware vCenter and Login
You will connect to VMware vSphere via its HTML5 interface.
Login using the information in the Credentials dropdown or, for your convenience, below:
-
Enter the User name:
pod3u1
-
Enter the Password:
cisco.123
-
Click Login
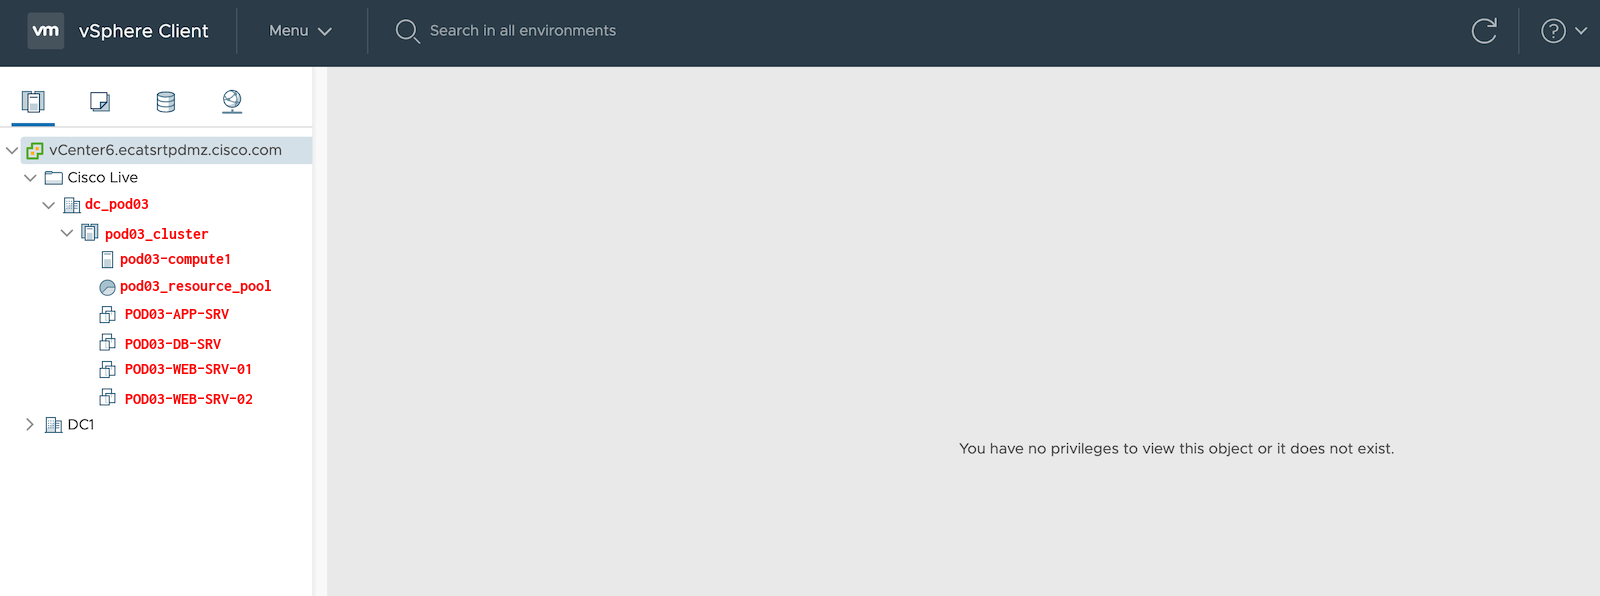
Step 2 - vCenter Environment
Upon a successful login, you will have a view similar to the screenshot below. For this lab, you have your own DataCenter and Cluster.
Within the Cluster, you have a Cisco UCS C-Series ESXi host that has several provisioned virtual machines with no operating system.
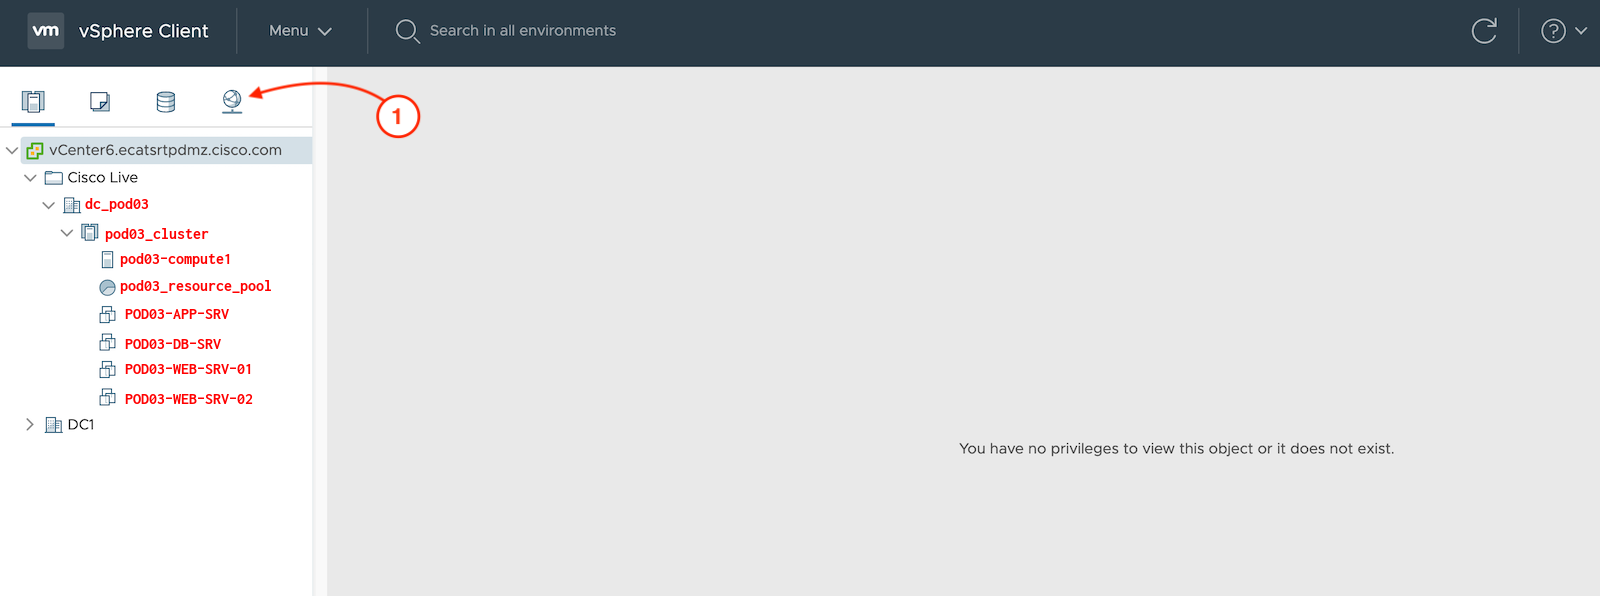
Step 3 - Navigate to vCenter Networking
To navigate to and view this APIC created vDS:
- Click the 4th icon, Network
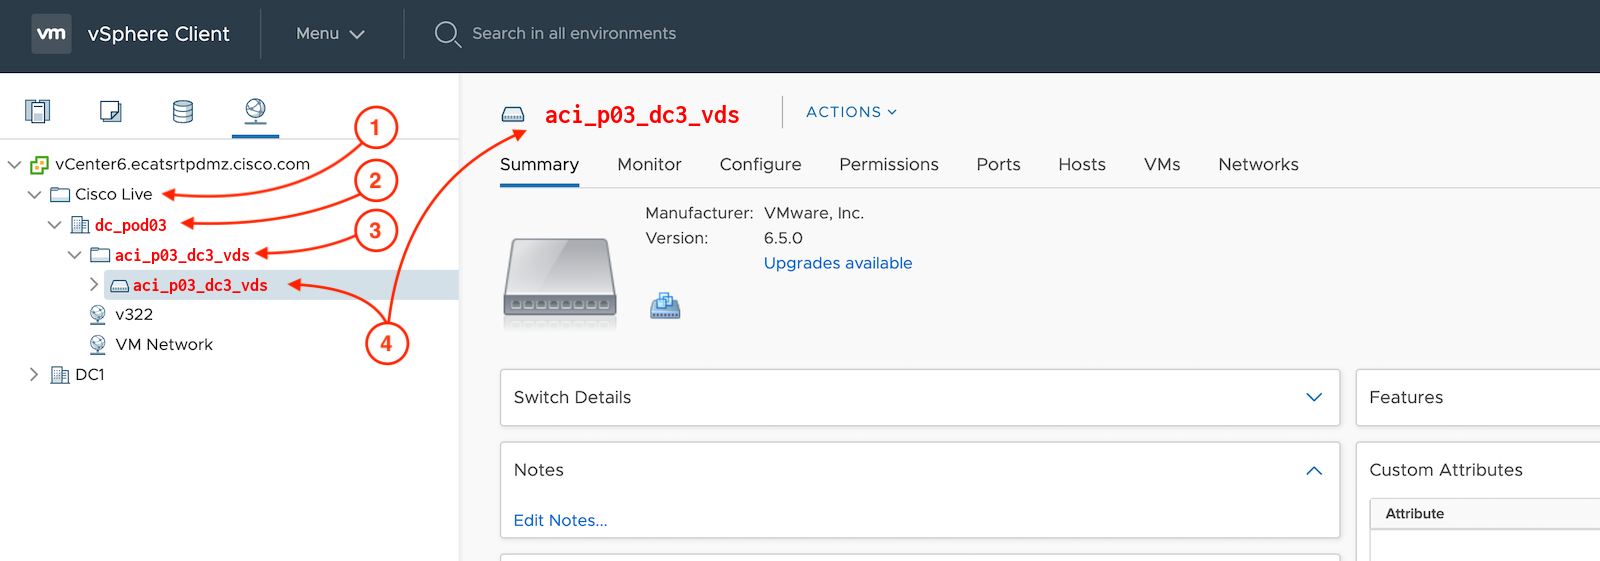
Step 4 - Verify vCenter vSphere Distributed Virtual Switch Created by APIC
vSphere Distriubted Switches extend across DataCenters in vCenter. To view the APIC created vDS:
- Expand the Cisco Live folder
- Expand your DataCenter: dc_pod03
- The vDS created by APIC resides in a vDS folder. Expand your vDS folder: aci_p03_dc3_vds
- Click on your APIC created vDS: aci_p03_dc3_vds
Now that you have seen that the APIC can create and manage vSphere Distributed Switches through VMM integration, continue to the next section to complete
the integration.
