Connecting the APICs to the fabric is a simple process. In the back of the APIC are various Ethernet interfaces that include
the CIMC interface, two onboard 1G network interfaces and two 10G SFP+ interfaces provided from a VIC/CNA through a PCIE slot.
It is 10G fiber interfaces that are used to connect to the ACI fabric.
The back of the controller looks like:
As a best practice each APIC should be connected to two leaves. This will use an ACTIVE/STANDBY type configuration.
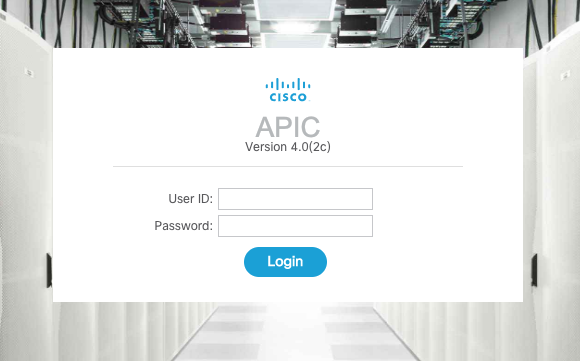
Getting to the APIC front end GUI
The APIC has a web-based front end GUI that is used for various purposes. If you point your browser to the management IP address
configured for a respective APIC you will see a screen similar to the following:
It is important to note that HTTPS is enabled by default and not HTTP.
Discovery of First Leaf Node
The connectivity of the ACI fabric is pretty simple, "every leaf switch connects to every spine switch, leaf switches do not connect to each other and
spine switches do not connect to each other." If everything is connected correctly the discovery process will start and will discover
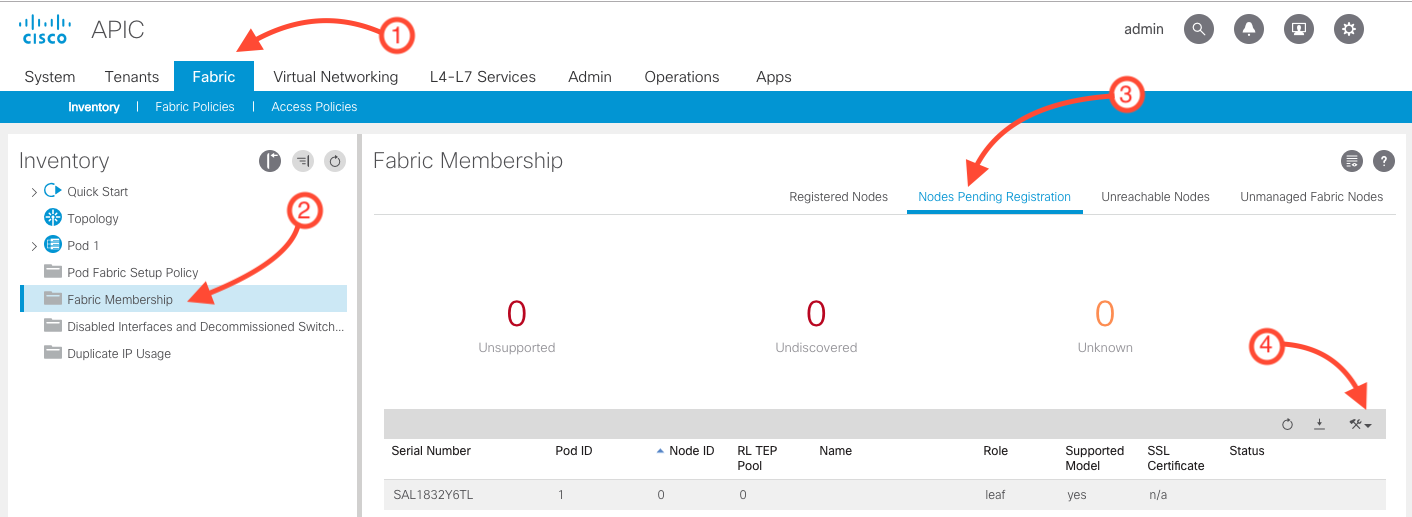
the first leaf. The first discovered leaf would be found within the APIC under Fabric > Inventory > Fabric Membership > Nodes Pending Registration:
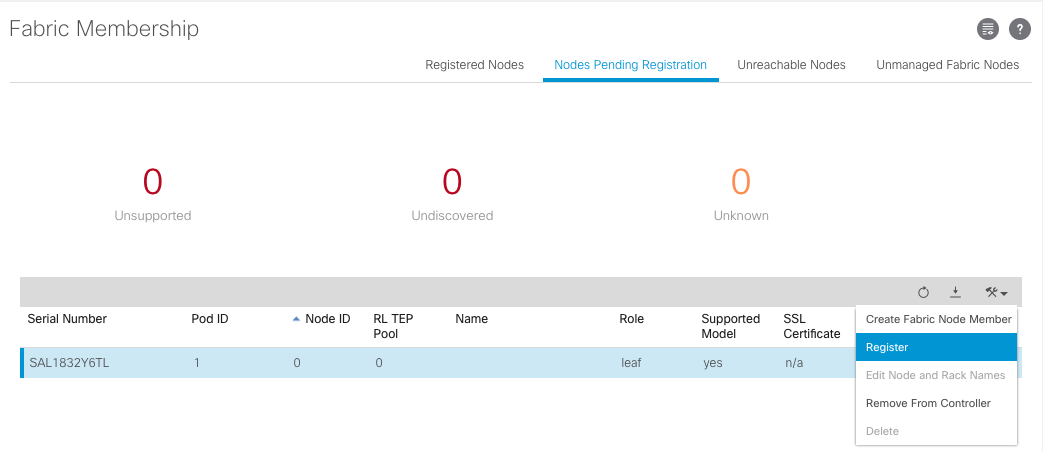
Now that you are able to see the first leaf in the APIC, you need to register the leaf to participate in the ACI fabric. This is done by using the tools
dropdown and clicking Register:
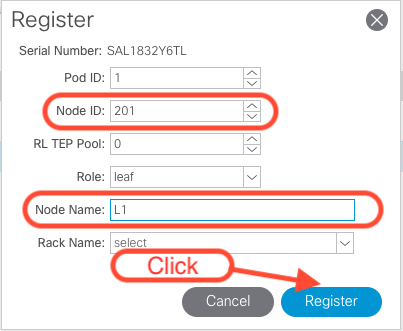
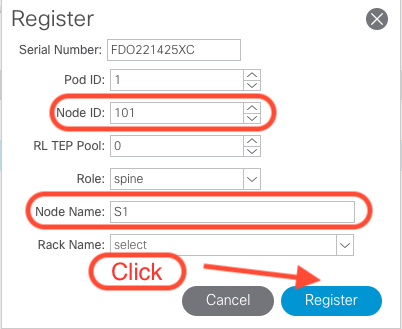
The next step is to provide the following parameters such that the APIC will initialize the node:
Node ID : In our case, we are using 201 for our first leaf. We are leveraging the 100 range for the Spine switches and 200 range for the Leaf
switches.
These could be any numbers but, it is important to follow a good numbering scheme.
Node Name : Our first leaf would be called L1 with subsequent leaf nodes being L2, L3, etc. Then, the Spines would be S1, S2, etc. Again this
is arbitrary and you can use any
naming convention.
Once the first leaf has finished the initialization process, the fabric will continue to discover the other devices starting with the Spine(s).
Then, you will need to follow the same steps as previously covered for leaf L1, but in this case, we will be registering the Spine(s).
At this point you may wonder how APIC was able to determine the role of the devices (Leaf vs Spine). The reason
is because APIC has full understanding of the devices that are connecting to the fabric via their device information. Therefore APIC is able to
determine a Leaf vs Spine. This is another value of having an integrated solution like Cisco ACI.
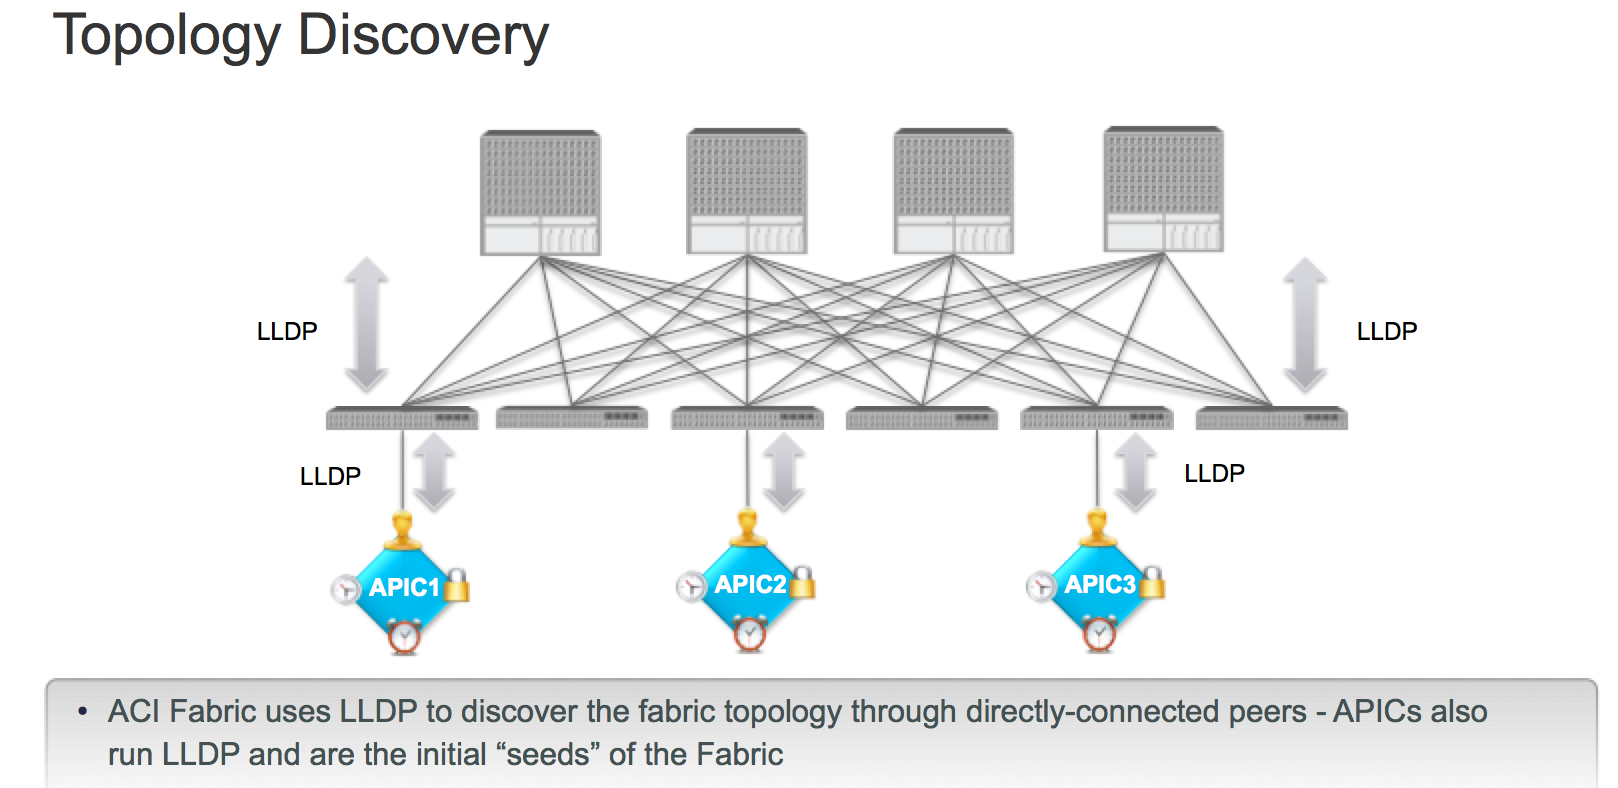
Fabric Discovery
The discovery process covered above is known as Fabric Discovery and is done through standards-based LLDP. The process of discovering and registering each
node
continues until the entire topology has been discovered.
Finishing the Discovery Process
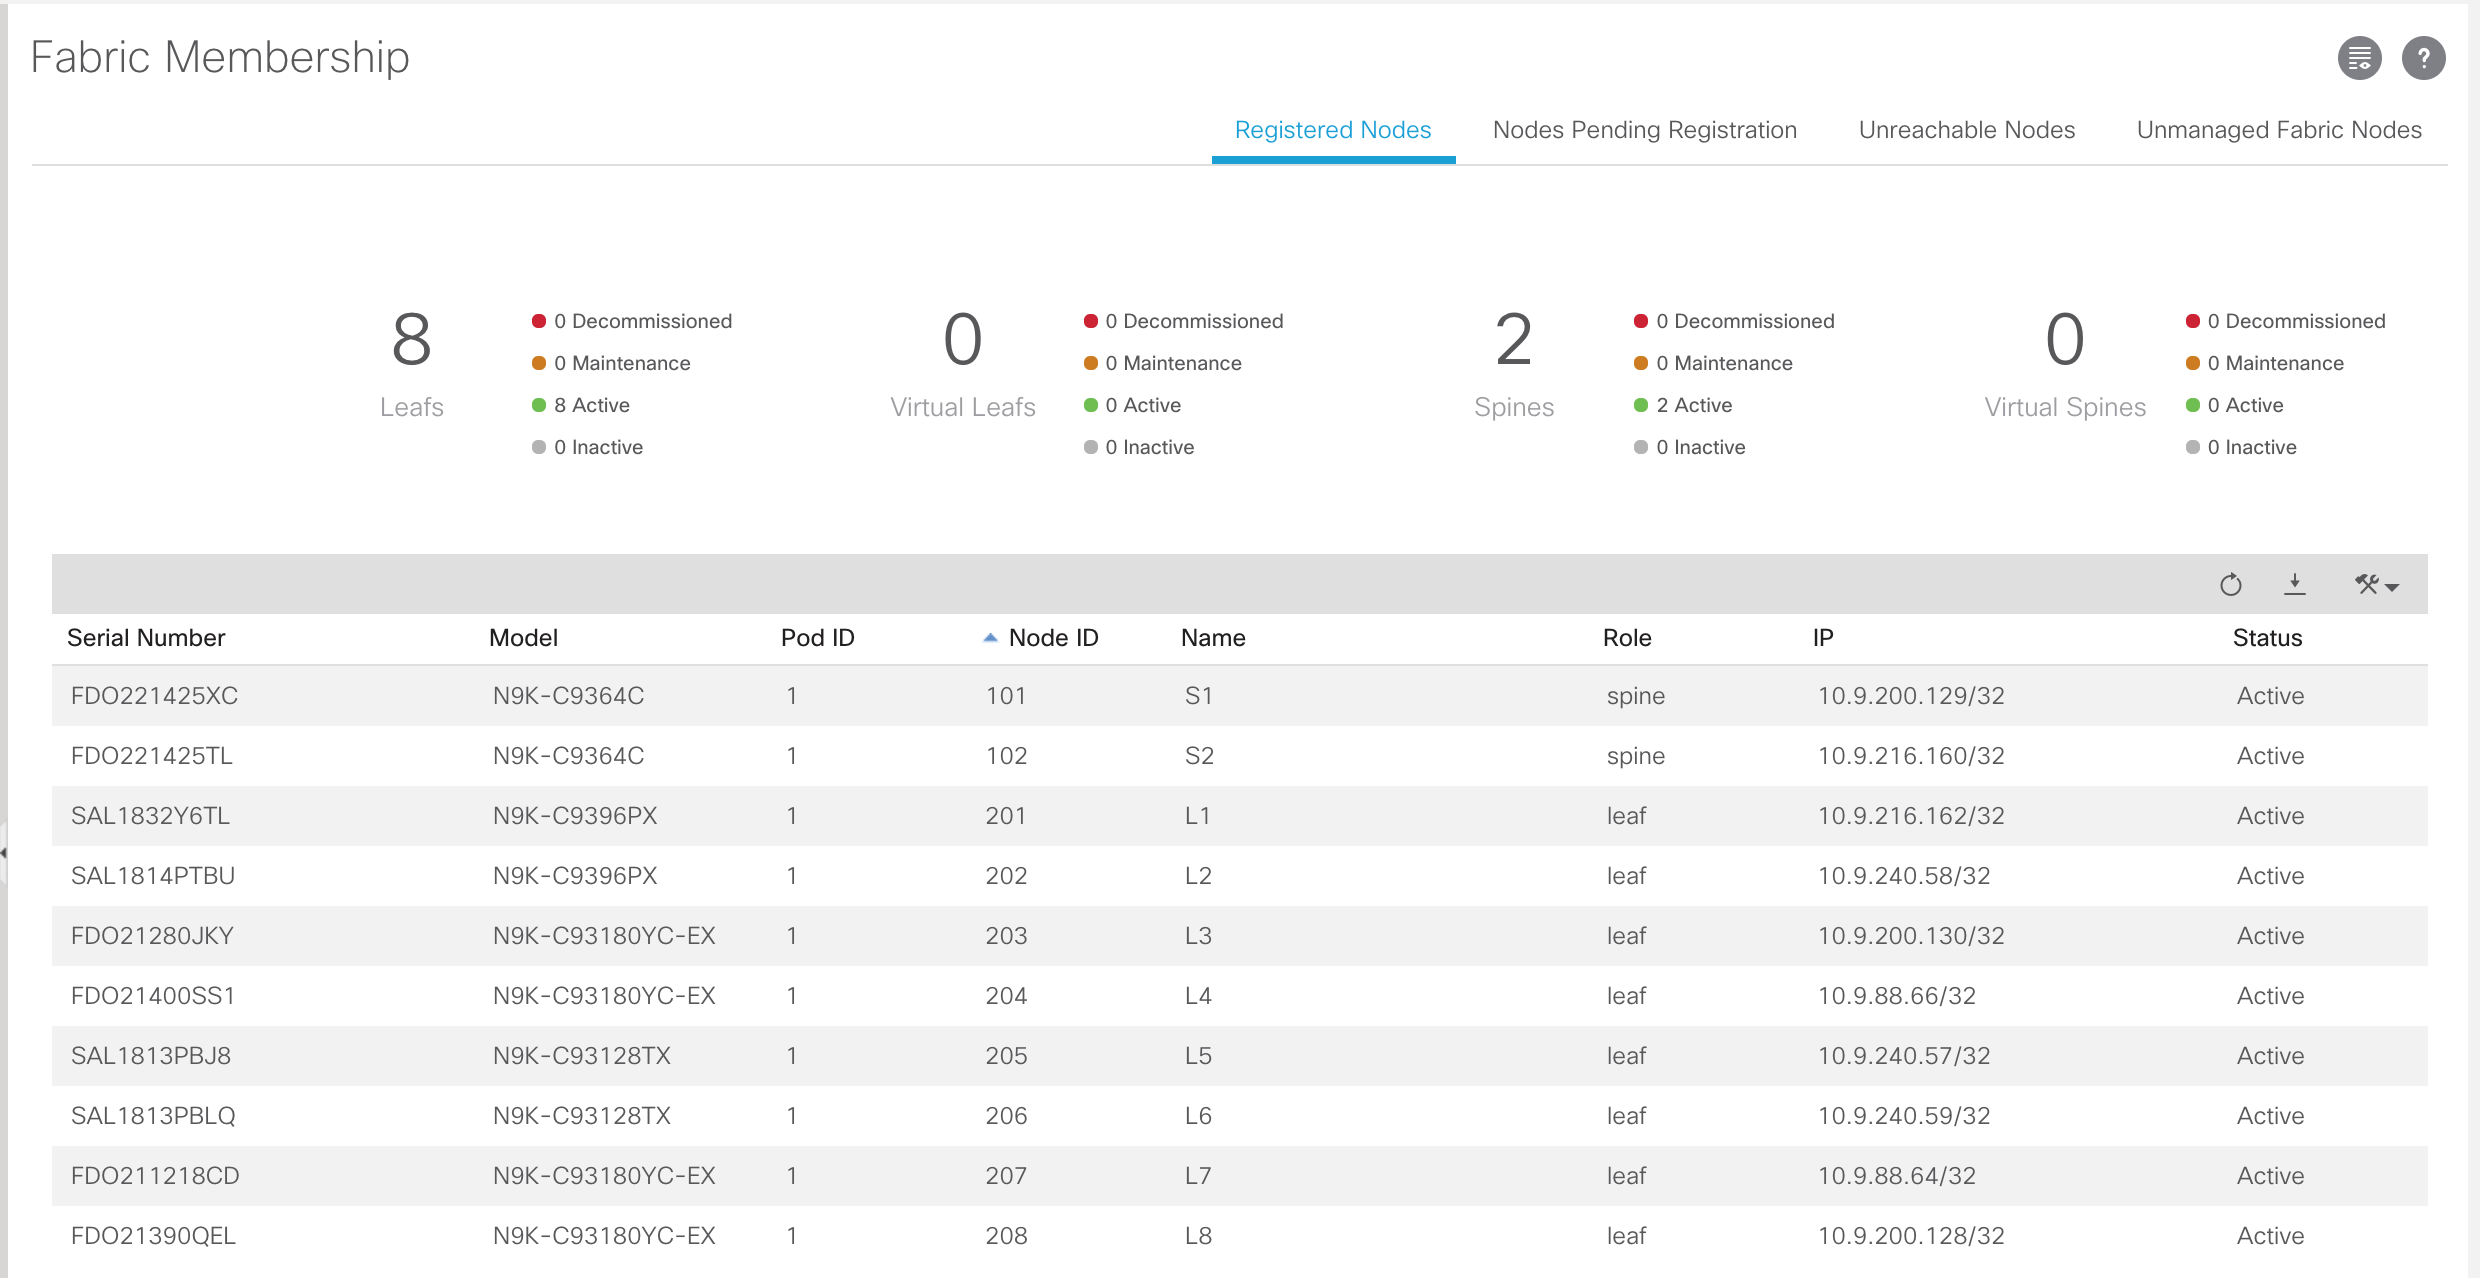
It is also important to notice that the APIC is managing the assignment of the TEP addresses. The APIC is
leveraging the initial pool of addresses we provided during the initial setup. This becomes critical because
the APIC is automating the entire process of the underlay and the creation of the Virtual Tunnel End Points (VTEPs). After
the discovery process, administrators have a display of each node that resides within the fabric:
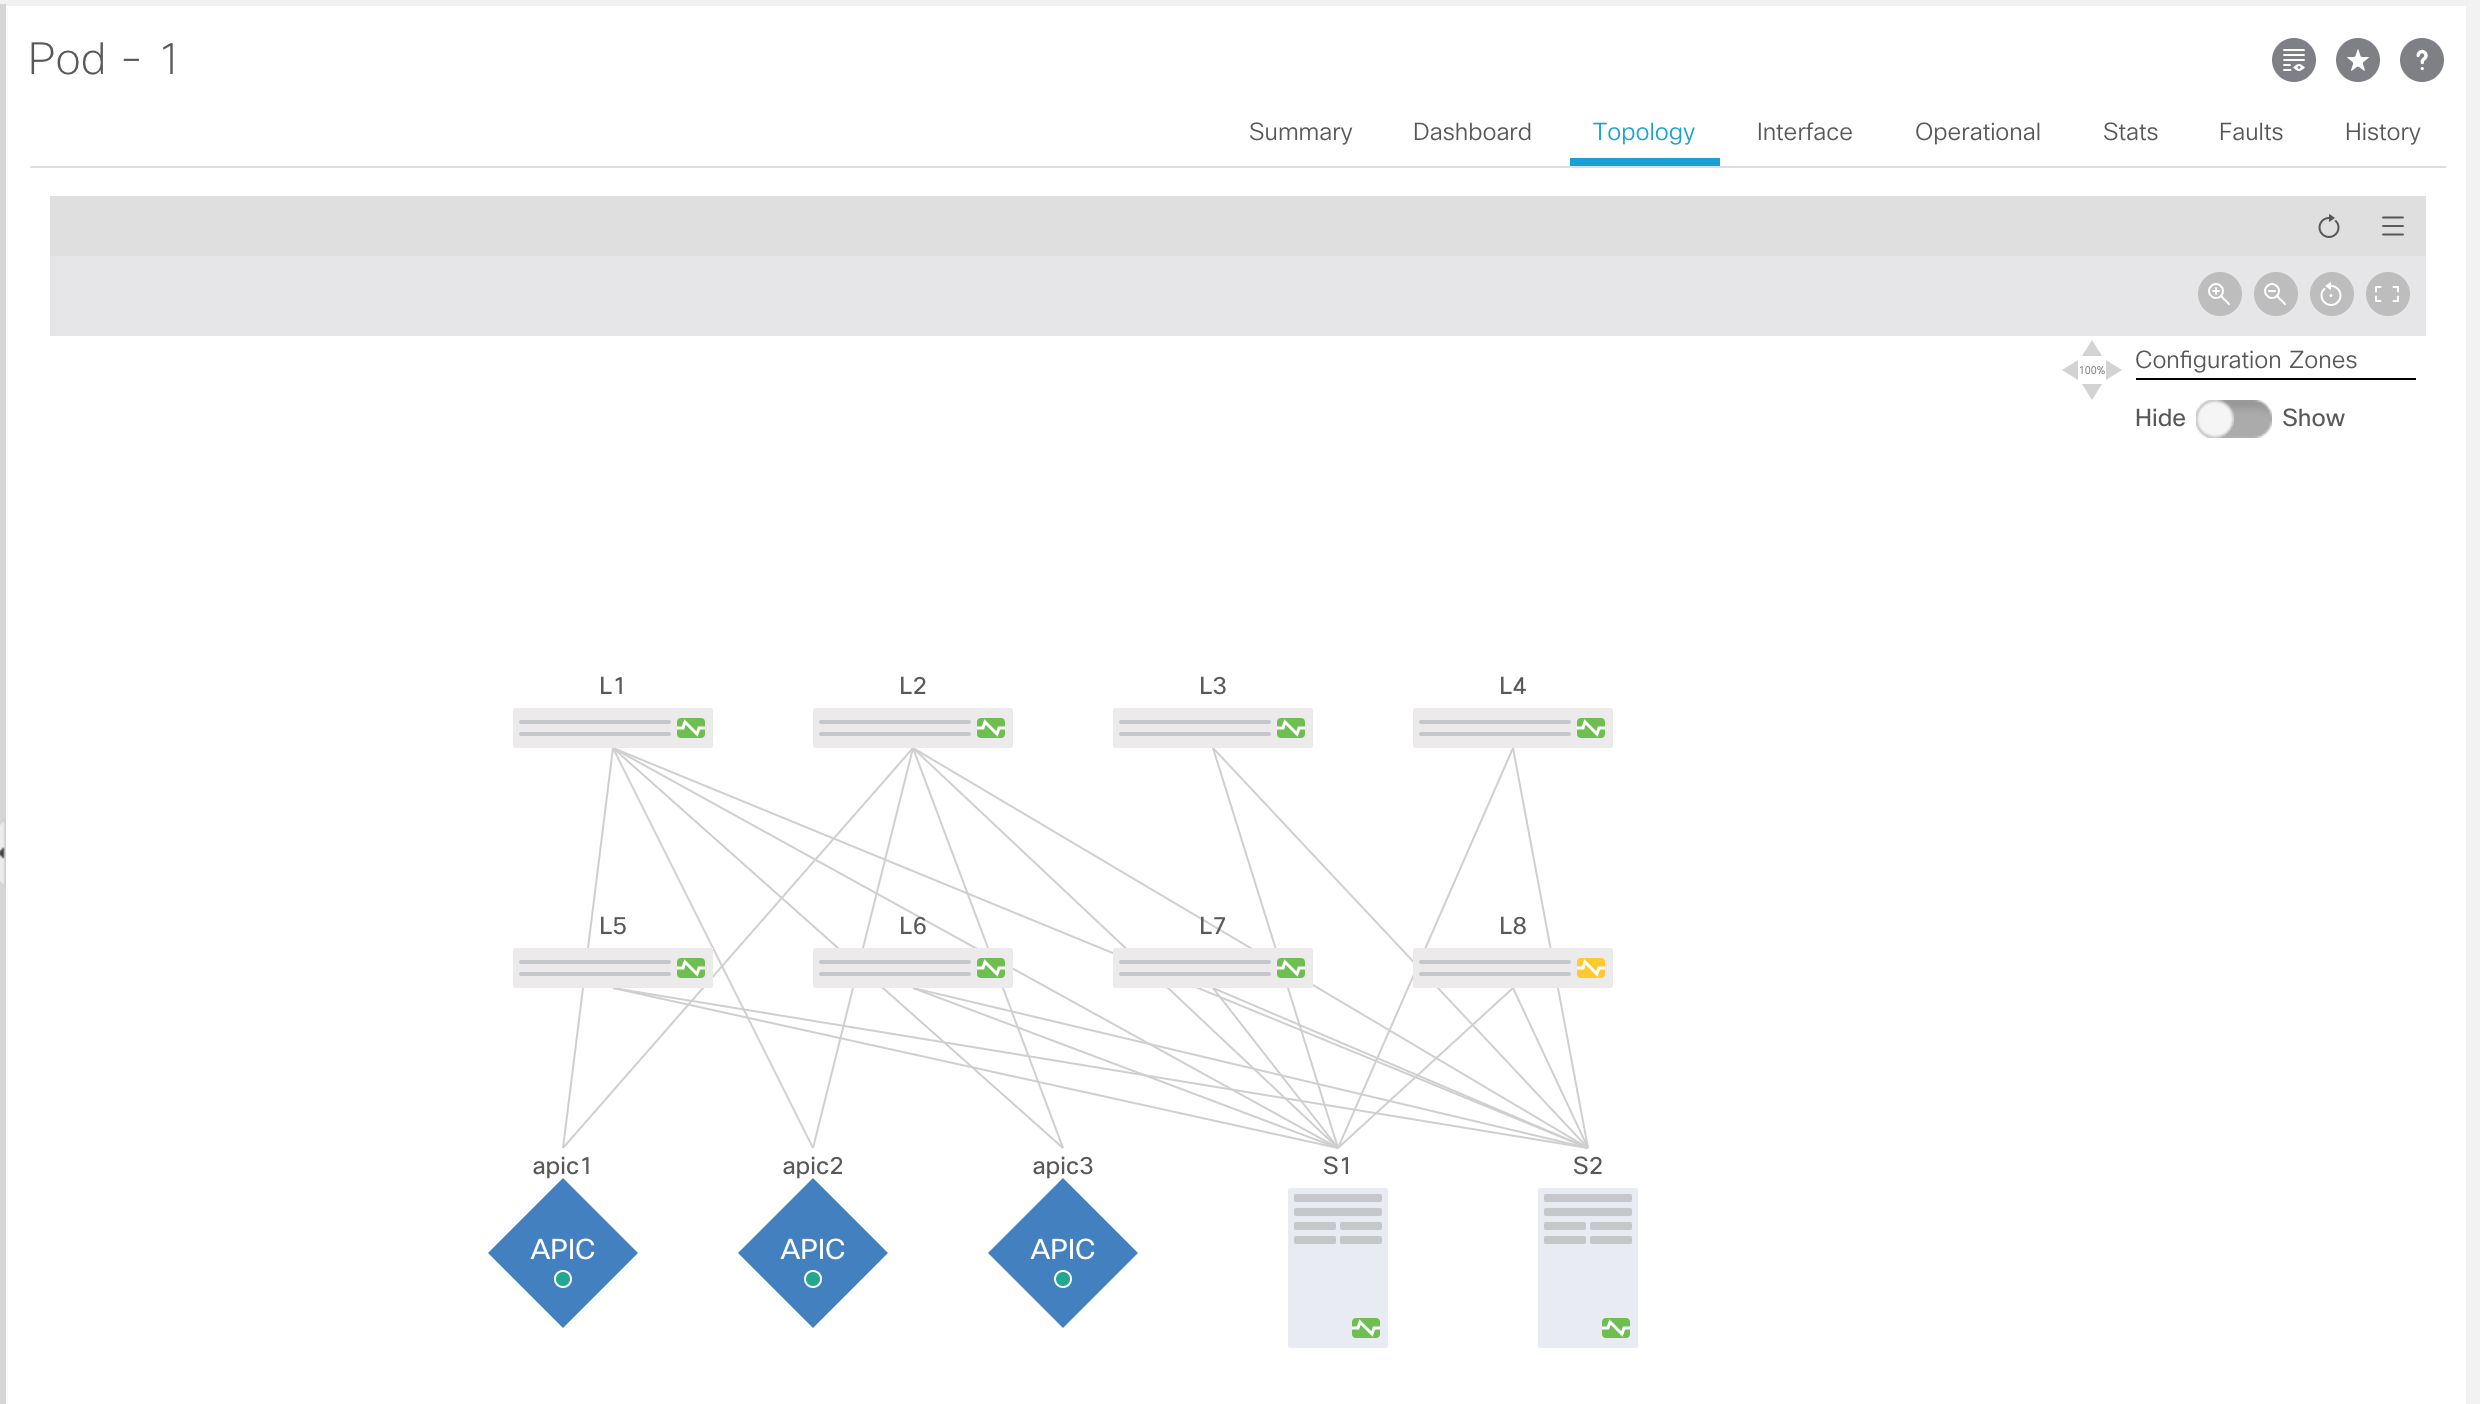
After the discovery process has completed, administrators also can display how the fabric looks from the Topology
menu as shown below:
Conclusion
As seen in the previous sections, the ACI initialization process has been automated to the point where customers are only required to
have a very minimal interaction with the system. It is also important to notice that adding or removing switches from the fabric becomes
very easy as well. This process could be further automated using the APIC's northbound API, but this is outside the scope of this lab.
For example, if you need to add a new set of leaves, all you need to do is follow the same procedure as described above. If you need to
replace a device from the fabric, the user just needs to remove the device from the fabric and assign the same node number to the newly added device.
With a basic understanding of how the fabric is initialized, continue to the next section where you will get logged into the an APIC and
will have access to the ACI fabric.