In any network a device lives as an entity that performs a specific function. You can have endpoints like
computer laptops, printers, scanners and servers to list just a few. In today's environment we try to mold
these endpoints inside definitions that stipulate what they are and more importantly what they
can reach. More and more administrators are looking at ways of being able to classify how devices in the network
can talk and to whom.
In ACI we group devices that have similar policy enforcements inside a construct called the EPG or end point group.
Devices inside these groups share a common set of policy enforcements that the administrator can control. The big
advantage of this can be thought of as being able to group common devices in access-lists. Instead of
having to specify what each device can talk to, you define the EPG constructs policy and how they can talk to other
EPG's and any device that belongs to that group inherits the policies. This simplifies management of policy enforcement
of devices between the network. Say for example that you want to only permit that the web servers only allow connections
port 80 and 443, you simply would create the policies in the fabric and just place devices inside the policy group that
would then know these entities only traffic to port 80 and 443 is allowed. By placing the virtual machine, physical server
or other device inside the group it would only allow 80 and 443 traffic inbound.
The name we give to the definition of these policies in the ACI fabric is the Application Profile. This is a collection of policy definitions
as to how different end point groups can talk to each other. Some of the policy terms are contracts,filters and service graphs.
For example, you can create a End Point Group (EPG) for your
web servers that can only receive traffic on port 80/443 from the external users (e.g. Intranet/Internet). Yet internally, the WEB EPG group of devices
can speak to the Database End Point Group(EPG) via port 3306. These relationships can be built by the
network administrator or even by the programmer of the application in itself when the application is being developed providing a
more secure network for the application and the network administrator.
By default ACI is a "white list" model where devices in different EPGs are not allowed to communicate to each other. This model is different than the
one we have been using in the past where anybody is allowed to communicate with each other as long as the underlying layer-2 and layer-3
networks are part of the same VRF and nothing is defined to inhibit the traffic flow. In order for EPGs to communicate with each other, ACI uses
the concept of contracts. Contracts define the way two separate End Point Groups (EPG) communicate with each other. Contracts can
be as simple as to permit a specific port between the two groups. They can also be very complex to redirect traffic to
services with service graphs and policy based redirects.
In this section, we will be creating the Management Application Profile. This Application Profile will be leverage for this
lab in order to attach the Virtual Machines to get their DHCP addresses. In some deployments this will be using carrying
other traffic such as SSH, Virus Updates, etc.
Step 1 - Navigate to Application Profiles in the Tenants Tab under Tenant
Create an Application Profile by:
- Tenant: aci_p03_tenant
- Right Click on Application Profiles

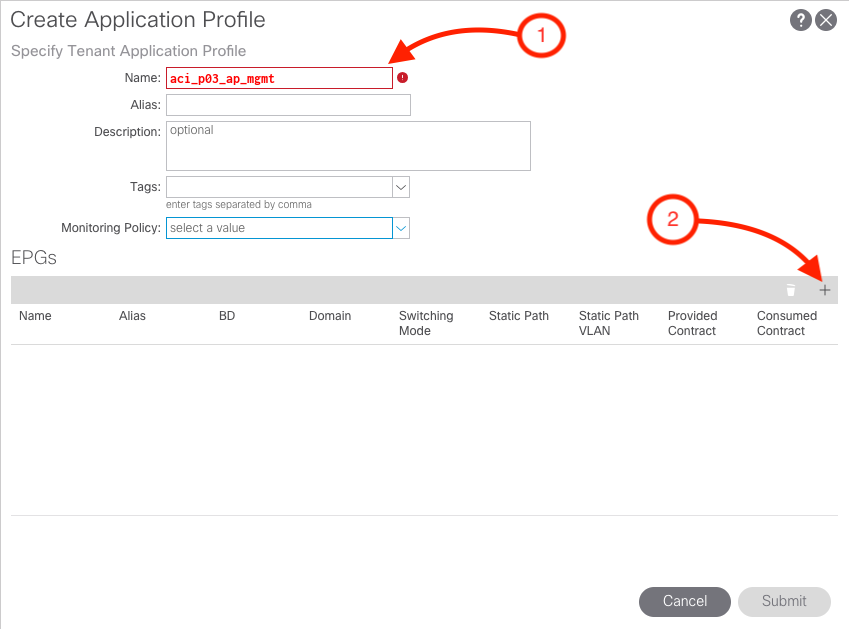
Step 2 - Create Application Profile
In this step, we will be creating one EPG named aci_p03_epg_mgmt which will allow Virtual Machines to be able to
communicate to the Management Network.
-
Name the of the Application Profile
aci_p03_ap_mgmt
- Then click the plus sign (+) button to add to create EPGs
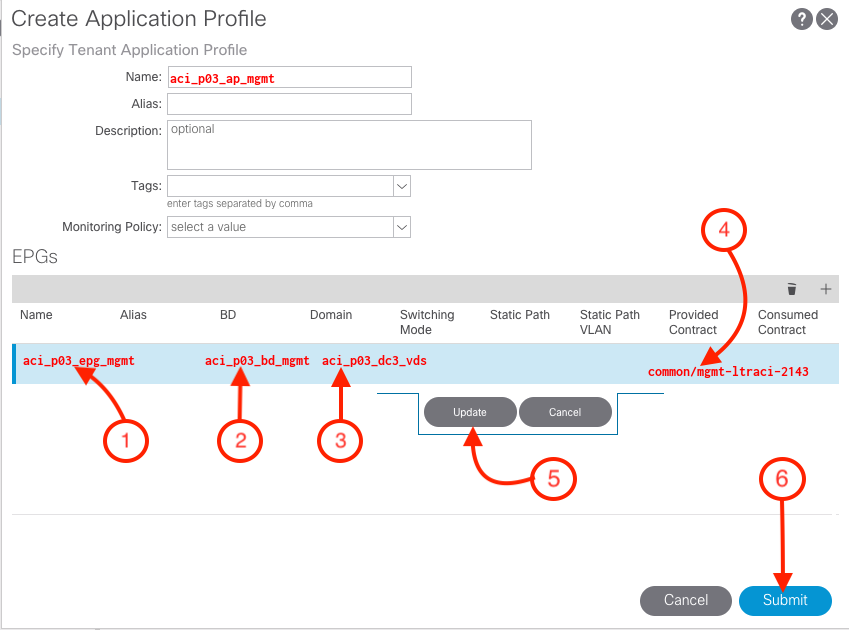
Step 3 - Create MGMT EPG
During this step, we need to input the following parameters:
-
Name of the EPG :
aci_p03_epg_mgmt
-
BD: This is the BD that is going to be associated to the EPG. This steps we will be associating the
aci_p03_bd_mgmt to aci_p03_epg_mgmt
-
Domain: In this particular example, we will be associating the domain to our
VMM Domain aci_p03_dc3_vds.
-
Provided Contract: common/mgmt-ltraci-2143
- Click Update
- Click Submit
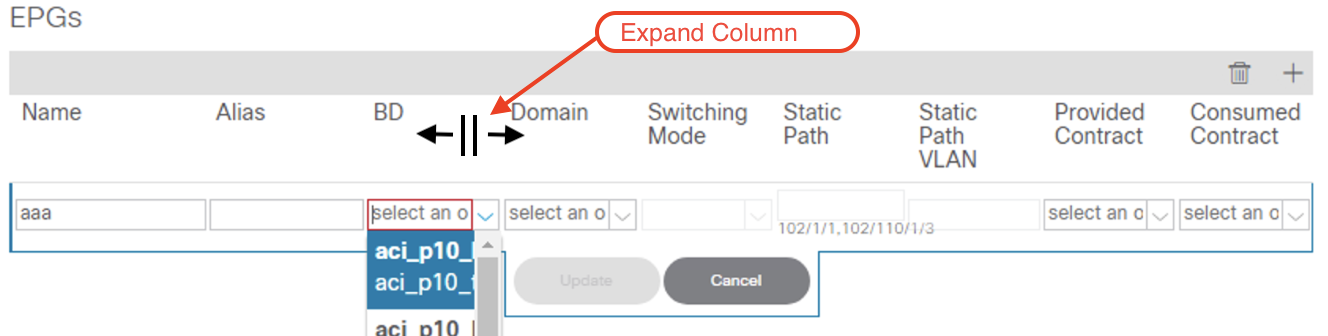
Alert
Depending on the screen resolution, the entire name may not be displayed completely. In order to expand the
column, hover the mouse over the line and expand the column.
You should see the following screen showing the newly created Applicaton Profile
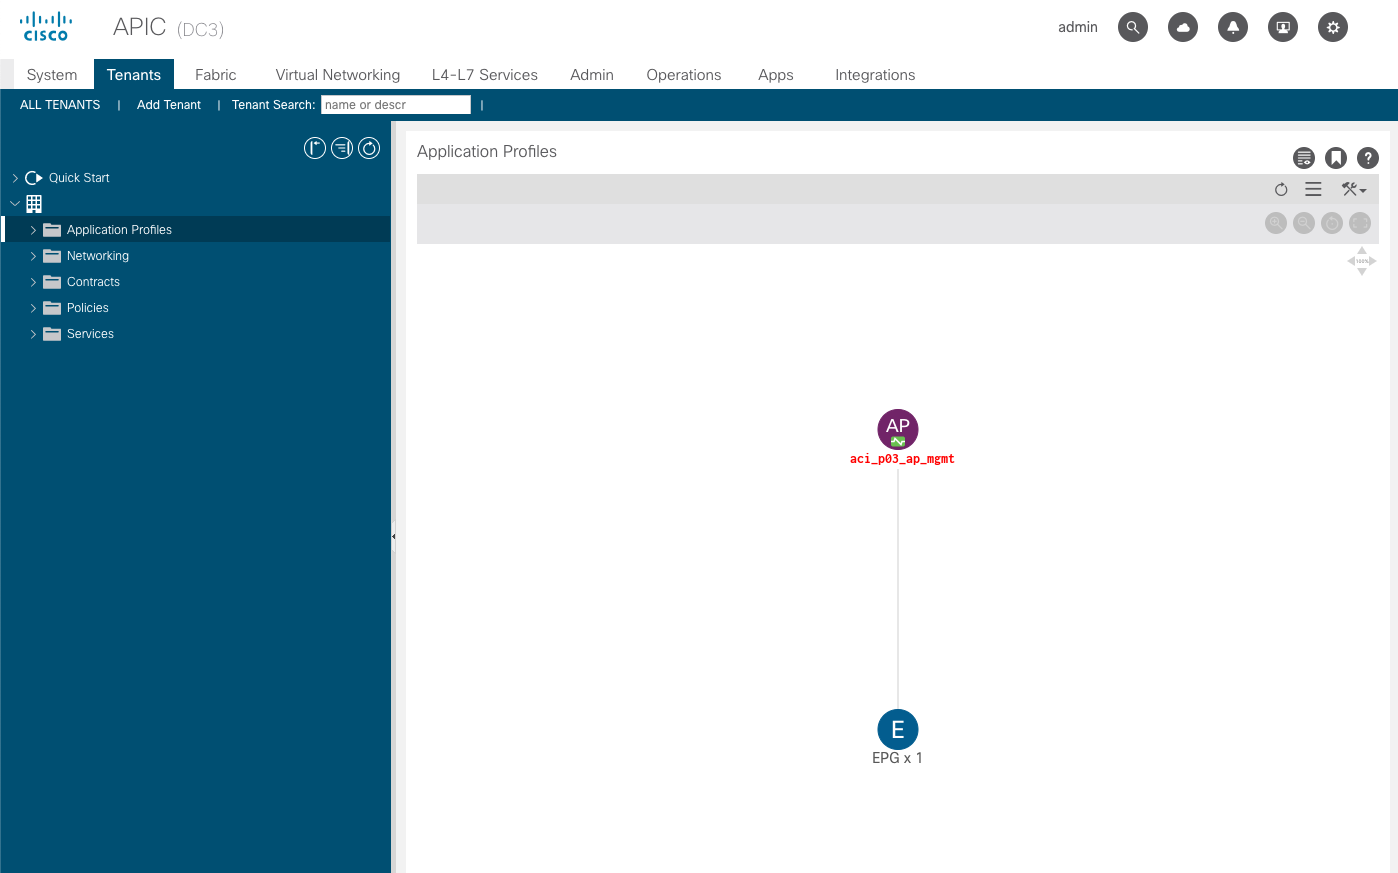
Before proceeding verify that the APP Profile was correctly setup.
ACI Object
This is the response from the fabric as to what is configured.
